You are trying to get your new shiny app deployed to AWS either to save cost, try out a new option or any other reason you have in mind. You figure it’s not as straight forward as you think, this tutorial will try and lend a helping hand.
This tutorial assumes knowledge of these services and won’t be explaining some terms.
Create and Configure S3
-
Navigate to your AWS console, and create an S3 bucket.
The guide below will help with thathttps://docs.aws.amazon.com/AmazonS3/latest/gsg/CreatingABucket.html
It’s important that you uncheck the Block all public access box while creating your bucket.
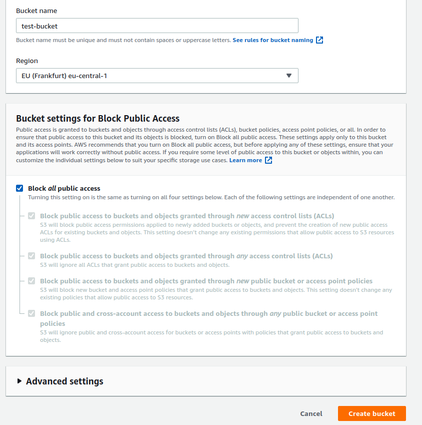
Uncheck the Block all public access option.
- Next, we will configure our bucket for static website hosting.
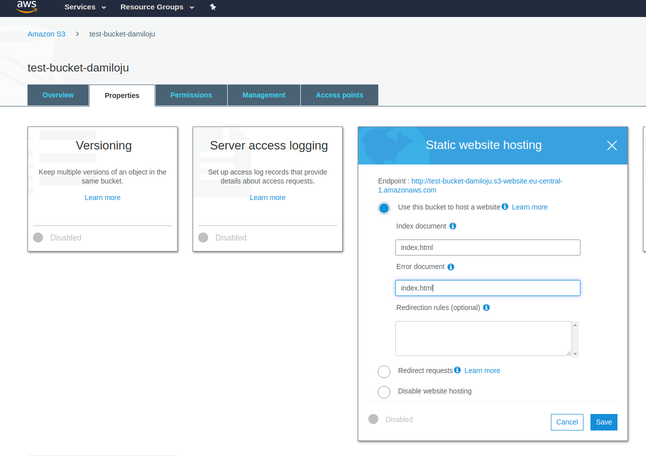
Configure Bucket.
As shown above;
- Select your created bucket from your list that would be displayed at S3 Home
- Navigate to the properties tab and select the Static website hosting option from the list of options.
- Check the
Use this bucket to host a websiteoption - Change the
Error Documenttoindex.html(This is because our application is a SPA, and the index page does all the error handling). - Save
We are done with S3.
Create and Configure Cloudfront (Optional)
This step is optional, but I recommend you do it.
The tutorial below will help with setting up CloudFront and configuring it for our S3 bucket above
Cloudfront Serve Static Website.
Setup Project Scripts
Create a new deploy.sh file in your project directory, and copy the contents below into it.
#!/bin/bash

export AWS_ACCESS_KEY_ID=
export AWS_SECRET_ACCESS_KEY=
export AWS_BUCKET_NAME=
export AWS_CLOUDFRONT=

# Load nvm (node version manager), install node (version in .nvmrc), and npm install packages
[ -s "$HOME/.nvm/nvm.sh" ] && source "$HOME/.nvm/nvm.sh" && nvm use
# Npm install if not already.
[ ! -d "node_modules" ] && npm install

npm run build
gulp deploy- Your
AWS_ACCESS_KEY_IDandAWS_SECRET_ACCESS_KEYcan be gotten from the AWS console, the guide below will show you how if you don’t already know or have them AWS Docs. AWS_BUCKET_NAMEis the S3 bucket name we created above e.g mine istest-bucket-damilojuas shown in picture 2.AWS_CLOUDFRONTis our CloudFront distribution ID. It can be found here CloudFront
Important that you change the mode option of your project in your nuxt.config.js to spa
Make deploy.sh executable
Make deploy.sh executable and not check into gitignore.
chmod +x deploy.sh

echo "
# Don't commit build files
node_modules
dist
.nuxt
.awspublish
deploy.sh
" >> .gitignore
If you are on Mac or Linux, you can copy the code above, then paste it in your terminal to make deploy.sh executable.
Install Gulp
Next, add gulp to our project and install it globally. Run the commands below.
npm install —save-dev gulp gulp-awspublish gulp-cloudfront-invalidate-aws-publish concurrent-transform
npm install -g gulp
Configure gulpfile
Now create a gulpfile.js file at the root of your project directory and add the contents from the script below to it.
const gulp = require("gulp");
const awspublish = require("gulp-awspublish");
const cloudfront = require("gulp-cloudfront-invalidate-aws-publish");
const parallelize = require("concurrent-transform");

// https://docs.aws.amazon.com/cli/latest/userguide/cli-environment.html

const config = {
  // Required
  params: {
    Bucket: process.env.AWS_BUCKET_NAME
  },
  credentials: {
    accessKeyId: process.env.AWS_ACCESS_KEY_ID,
    secretAccessKey: process.env.AWS_SECRET_ACCESS_KEY,
    signatureVersion: "v3"
  },

  // Optional
  deleteOldVersions: false, // NOT FOR PRODUCTION
  distribution: process.env.AWS_CLOUDFRONT, // CloudFront distribution ID
  region: process.env.AWS_DEFAULT_REGION,
  headers: {
    /* 'Cache-Control': 'max-age=315360000, no-transform, public', */
  },

  // Sensible Defaults - gitignore these Files and Dirs
  distDir: "dist",
  indexRootPath: true,
  cacheFileName: ".awspublish",
  concurrentUploads: 10,
  wait: true // wait for CloudFront invalidation to complete (about 30-60 seconds)
};

gulp.task("deploy", function() {
  // create a new publisher using S3 options
  // http://docs.aws.amazon.com/AWSJavaScriptSDK/latest/AWS/S3.html#constructor-property
  const publisher = awspublish.create(config);

  let g = gulp.src("./" + config.distDir + "/**");
  // publisher will add Content-Length, Content-Type and headers specified above
  // If not specified it will set x-amz-acl to public-read by default
  g = g.pipe(
    parallelize(publisher.publish(config.headers), config.concurrentUploads)
  );

  // Invalidate CDN
  if (config.distribution) {
    console.log("Configured with CloudFront distribution");
    g = g.pipe(cloudfront(config));
  } else {
    console.log(
      "No CloudFront distribution configured - skipping CDN invalidation"
    );
  }

  // Delete removed files
  if (config.deleteOldVersions) {
    g = g.pipe(publisher.sync());
  }
  // create a cache file to speed up consecutive uploads
  g = g.pipe(publisher.cache());
  // print upload updates to console
  g = g.pipe(awspublish.reporter());
  return g;
});
Execute deploy.sh
Now we are done. All you need to do now is execute your deploy script.
Go to your terminal and type ./deploy.sh
You should get something similar to the pictures below as output.
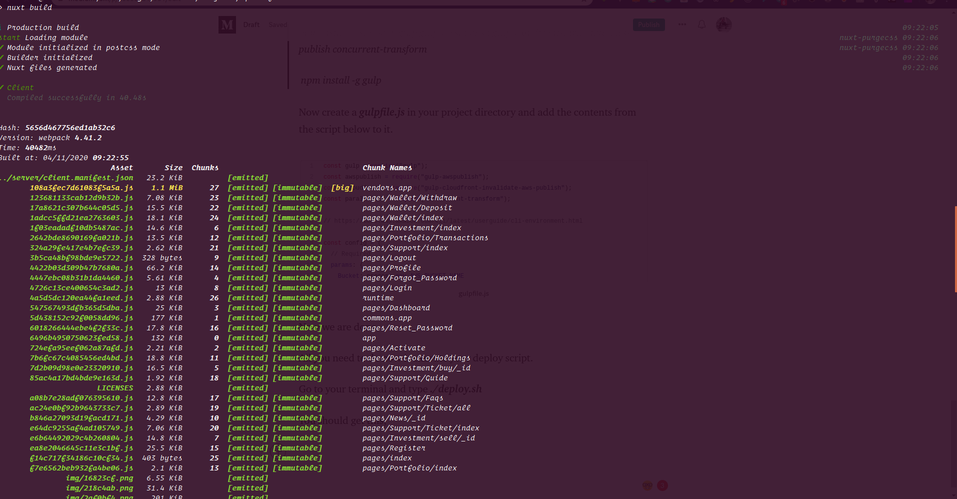 Terminal Output
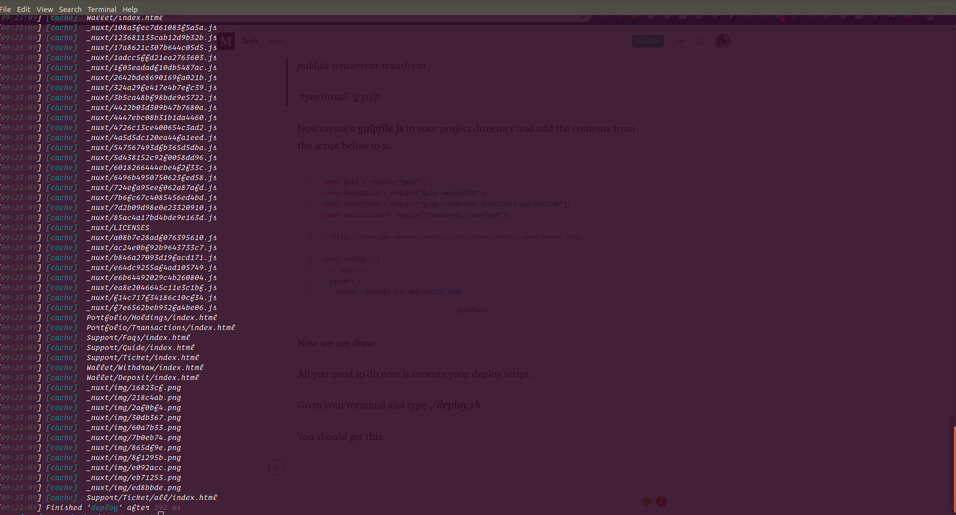 Terminal Output 2
We are good to go.